Tuesday, May 29, 2007

Easing Tweens

This tutorial will cover two ways to make Flash's motion tweens feel more natural. If you've worked in Flash you've probably figured out the first technique. The second is a slight alteration that I figured out myself and haven't seen anywhere else.

Also, before I go any further, if you have Flash 8 or above, you might not need these tricks since Flash allows you greater control of your tweens. But if you're like me and hate, hate, hate Flash 8, then keep reading.

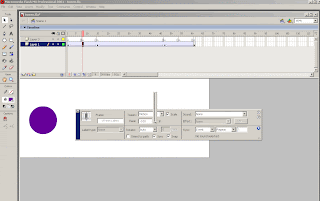
For simplicity's sake, I'll show these techniques by tweening a circle. So I'm moving the circle from left to right over the course of 61 frames.
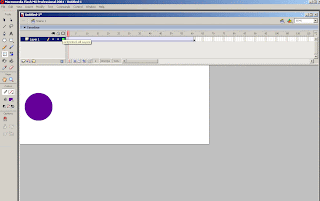


And here's what that looks like.


It's a little robotic. Instead of accelerating at the beginning and decelerating at the end, the circle moves at a constant speed the whole time. That's not how things work in the real world.

To fix that, let me first explain why I made the end keyframe at frame 61 instead of a more natural number like 60. This is because, in order to make the tween feel more natural, the first step is to put a midpoint keyframe that is equal distance from the beginning and end keyframes. If your first frame is an odd number, then in order to create an equidistant midpoint, your last frame must also be an odd number (and if your first frame is an even number, then your last frame also needs to be even). In my case, the the midpoint is at frame 31. If you're interested, to mathematically find your midpoint, just add the frame numbers of the beginning and end of your tween and divide by two.
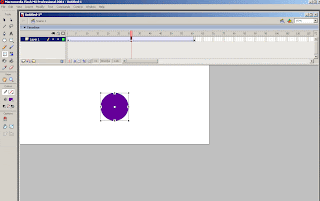
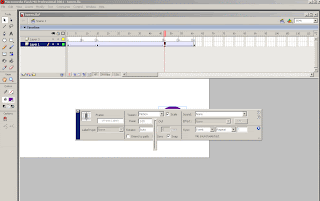
After setting your midpoint, go to the first frame, and adjust the tween to ease in 100. Let me also point out that it is hugely important to keyframe your midpoint BEFORE doing any of the easing. If you were to put the ease in 100 on the first frame and then set the midpoint keyframe, the circle wouldn't be in the right spot at that frame and the tween would look very jerky.
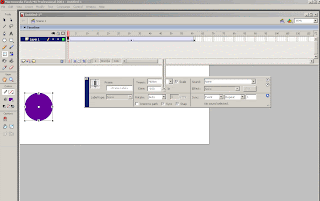

After setting the ease in, go to the midpoint frame and set the tween to ease out 100.
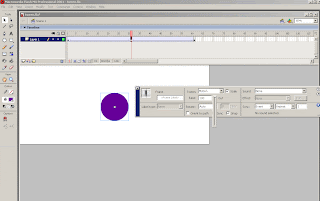
Let's check it out.


That's more natural. But let's see if we can do it one better. The problem with this technique is that the speed of your tween is constantly changing. It's speeding up all the way to the midpoint and slowing down from the midpoint to the end frame. This can be very distracting for really long tweens like slow camera pans.

Here's how you get a tween to speed up, maintain that speed and then slow down. Using the same circle set up, I've cleared all my keyframes and removed all the easing. Then I created a new layer above my tween.
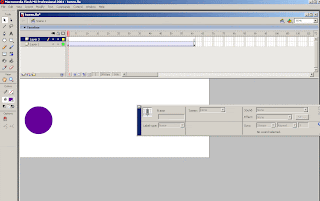

I'm basically using this new layer as a ruler to measure distances on my timeline.

So the first measurement to make is when you want your tween to reach it's full speed. Here again it's important to pick a frame number that will allow you to make an equidistant midpoint keyframe. I'm picking frame 15. So the first thing to do is put a blank keyframe on the new layer at frame 15.
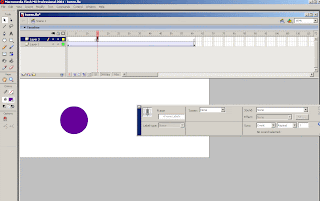
Next, determine where the midpoint is between those two blank keyframes. For me it's frame 8.
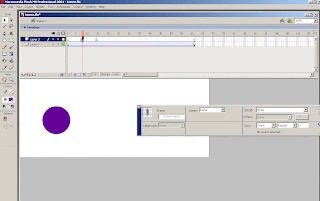
Now select those keyframes, hold down alt, and drag them to the end of your timeline. Now you have the same measurements at the end of your timeline as you made for the beginning.
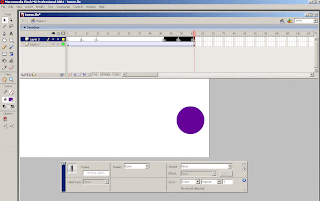
Next, on the tween layer, put keyframes at the two midpoints you measured out.
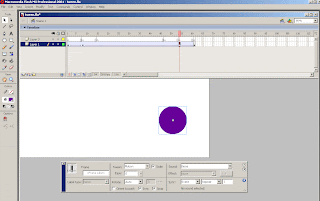
Then drag those keyframes to the two measured end points.
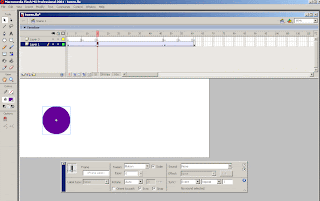
Now ease in 100 for the first section

And ease out 100 for the last section.

Let's see what that looks like


For a small movement like the one above, this technique might be a bit overkill, but for really long camera pans, like the second shot in this video, they're much more useful. Also, you'll probably have to play with the length of your easing in and out and find a timing and distance that feels natural. If I was to redo this one, I'd probably make the easing last 21 frames.

And now to compare the three tweens.

Nothing


1st technique


2nd technique


Friday, May 25, 2007

Perspective in Flash

Update: I am now offering this tutorial's FLA for 3 dollars through PayPal. Currently it's only available for Flash CS3 and up, but if there's demand I can make it for other versions as well. The FLA includes the building bellow with vanishing points and the final line work for the siege tower example bellow with vanishing points.


E-mail address you'd like to receive .ZIP file (96 kb)


This tutorial will cover a quick way to set up vanishing points and perspective lines in Flash. I'm not going to cover perspective concepts, if you don't know perspective already I suggest buying Creative Perspective for Artists and Illustrators by Ernest W. Watson. It's the best book I've ever seen on perspective (and I've seen a lot of them). He explains the concepts of perspective, but more importantly he then shows how the great golden age illustrators used perspective or broke the rules of perspective to get the best image possible. Perspective is a tool, a useful one to understand and utilize, but if you are a slave to it you'll go crazy making some pretty bland drawings.

First, sketch out your drawing. This is the most important step and the computer can't do a damn thing to help you. If you don't have solid drawing skills, you're not going to get too far. There's nothing I can say here that will help you get better at this except learn perspective and practice.

When drawing at this stage, I'm not concerned with details like windows, I'm concerned with the overall shapes and the placement and angles of lines. As you can see, this will be three point persepective drawing.
So now, let's find our vanishing points. The hardest ones to find here will be the two on the horizon line, so I'm going to find those first. Lock your sketch layer, create a new layer, select the line tool and draw straight lines that follow what you think are the two most important and correct lines you've sketched that are heading to Vanishing Point 1 (VP1). It helps if these lines are somewhat far apart from another. Where ever these two lines cross, that's where VP1 is.

How annoying. VP1 is very far away from the drawing. It's even outside Flash's work area. That's not a problem. Delete the perspective layer and symbolize your sketch drawing.
Now make a new keyframe of your background and scale it down. In the screenshot below I scaled the background image 50 percent, but VP1 ended up being so far away I had to scale it down even more later.

Now enter your background layer and draw the perspective lines on a new layer again. You don't have to get them to cross, just get them accurate to your drawing.

Then select one line, hit q to bring up free transform, and scale it up (while holding shift, in order to keep the scaling proportional).
And do the same for the other line, scaling it until it intersects the first
VP1 is at the intersection of those two lines. VP2 will be on the same horizon line as VP1, and since there's no dutching of the camera in this drawing, the horizon line is horizontal. To drop in the horizon line, bring up the Ruler (ctrl+alt+shift+r), and drop a horizontal line that runs through VP1.


Then pick the most important line in your drawing that goes to VP2, and draw it as a perspective line that intersects the horizon line. VP2 is the intersection of those two lines.

Now we have the two horizon line vanishing points, but what a pain it would be to constantly draw lines running from the VP's to where we'd like them on our drawing. Thankfully there's an easy work around.

Start with VP1. Delete out the sections of the perspective lines that overshoot the vanishing point. Then select one of the lines, make it a group and move the group's center point to where the vanishing point is.
Now when you want to make more lines running to VP1, just copy that group, paste it in place and rotate it. If the line needs to be longer, just hit q, and scale it up while holding down shift. The group will scale up but keep the center point right where it is.

Next do the same thing for VP2, and follow all the same steps to find the position of VP3.
Now exit the symbol, go back to frame 1 on the stage (that has the background at the correct size), enter that instance of the background symbol, and keep copying, pasting in place, and rotating lines to figure out the correct perspective.
As you can see, for the center building my initial sketch was pretty decent, but the top antenna part needs a good amount of fixing. Also those foreground buildings that frame the main building are WAY off in terms of perspective, but even if I was to finish this drawing (which I'm not), I probably would not make them perspectively correct because then the composition would be awkward. The trick with perspective is knowing when to use it and when to ignore it.

Here's an example of a Flash background I did a while ago using this exact same technique to figure out the perspective lines. You'll also noticed that I cheated the perspective on the vertical lines of the foreground element (it's a castle wall). I tilted the wall in more than it actually would in order to make it feel like it was at odds with the seige tower.
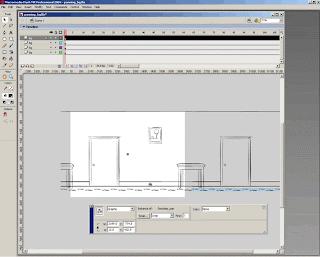
And lucky you, I actually kept some of my perspective lines as guide layers.

And once more, I am now offering this tutorial's FLA for 3 dollars through PayPal. Currently it's only available for Flash CS3 and up, but if there's demand I can make it for other versions as well. The FLA includes the building example with vanishing points and the final line work for the siege tower example with vanishing points.


E-mail address you'd like to receive .ZIP file (96 kb)


Editting Audio in Flash

A question that pops up pretty consistently on the Cold Hard Flash message board is how to edit audio clips in Flash. Lets say you have a 4 minute song you're making an animation for and you'd like to chop the audio into a bunch of sections so that you can split the video up between multiple Flash files.

The best way is to use an audio editing program, but if you're like me and don't own one, here's a work around.

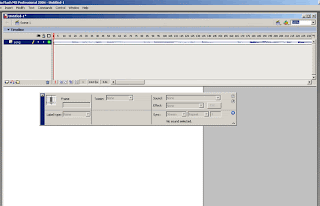
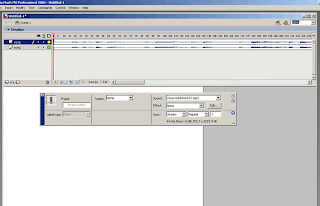
First, and foremost, import your audio.

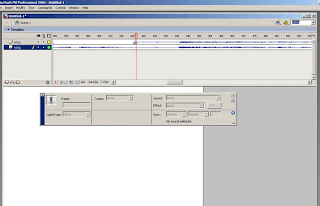
Find what frame where you'd like to break the audio, create a new layer, and put a blank keyframe at that point.
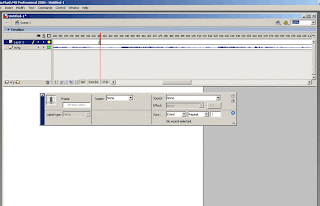
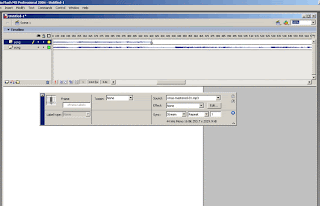
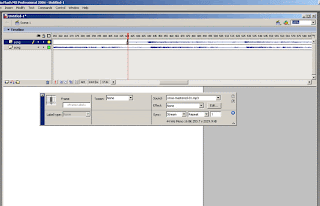
Go back to frame one. Copy the first frame of the audio and paste it into the new layer
As you can see on the new layer, the audio now ends where you'd like it to begin.
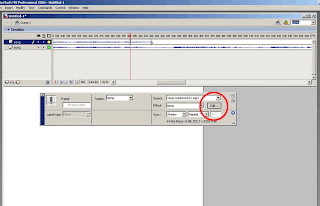
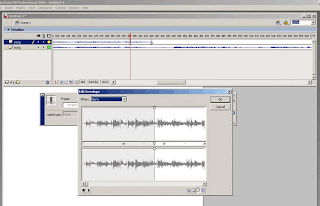
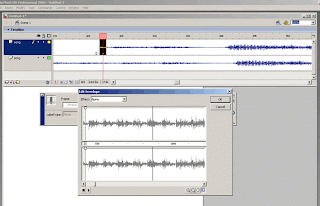
Select the audio in the new layer, bring up your properties panel and click Edit
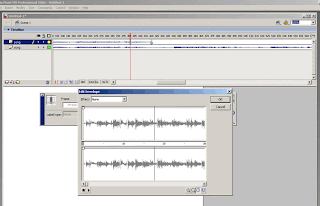
This will bring up the Edit Envelope dialogue box. Click on the zoom out icon until you see a vertical gray line running through the levels.
That gray line shows you where your piece of audio ends, which just so happens to be that blank keyframe we made earlier, so that gray line is also showing you where you want your audio to begin.

In between the left and right channel levels, there is a small gray bar that you can drag around. That bar tells flash where to start playing a piece of audio. So just drag the bar to the gray line.
Hit okay. Now back on the stage grab the newly edited piece of audio and have it start at the blank key frame you created earlier.
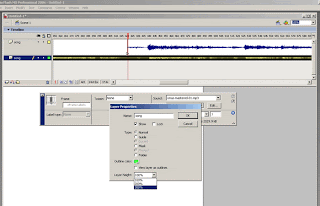
As you can see, we are close but not quite. Here comes the annoying part. First, in order to see the audio better, right click on each layer, choose properties and under the layer height pull down, select 300.
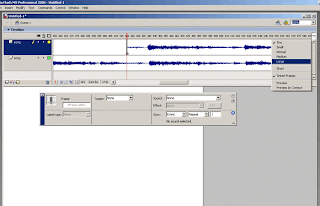
And if you want to be really picky (which I do), select large frames under the timeline's drop down menu.
Now go back in and refine the starting point of your new audio clip. As you can see on mine, the new clip starts a bit early so I need to push back the starting point.

Since these are small adjustments you are going to want to be zoomed in pretty tight in the audio Edit Envelope. Navigating the Edit Envelopes timeline and zooming in can be really annoying. Here's how you can find your starting point and easily zoom in on it.

First zoom out wide and scroll so that the starting point is all the way to the left on the timeline's visible section, and then zoom in. While zooming in with the Edit Envelope, the frame on the left stays put.
Now adjust your staring point. You want see the edit take place on the stage's timeline until you hit okay (very annoying), so this will probably take a few tries to get it right. You won't get it perfect but with a little patience you can get really really close.
Collapse your layer heights, zoom out on the timeline and you're good to go
When you hit play it won't sound perfect, you'll get a slight tinny echo, but for timing purposes and lipsync you'll be fine. You can go and copy that new piece of audio and place it in a new document.

Wednesday, May 23, 2007

Multiplaning Looping Panning Backgrounds

This tutorial is a continuation of the previous lesson on creating looping panning backgrounds.

Update: I am now offering this tutorial's FLA for 3 dollars through PayPal. Currently it's only available for Flash CS3 and up, but if there's demand I can make it for other versions as well. The FLA includes the looping background pan and the multiplaning looping background pan.


E-mail address you'd like to receive .ZIP file (25 kb)


So we left off with this


But that's not impressive enough for you. The kids love that 3D stuff, so lets give them some multiplaning action.

The loop we've already made will be the back most, slowest moving plane in our pan. Everything else will move faster. So when making a multiplane shot, make sure the first loop you make is your farthest back (the sky, or in this case, the wall.)

Now lets take a look at the two symbols we've made so far
background_pan contains the motion tween that makes the background move
background is the drawing that is the background.

What we need to do now is make duplicates of both these symbols to hold some new drawing. First thing I'll multiplane are paw prints running over the ground. So copy the instance of background_pan that starts on frame 51 and paste it in place on a new layer.
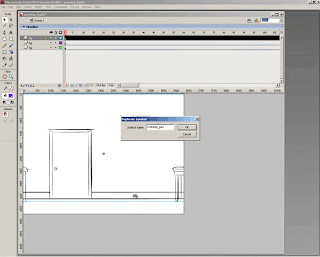
Now duplicate the symbol background_pan and call it footstep_pan.


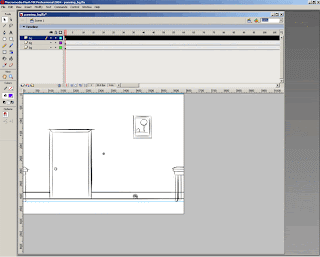
Enter footstep_pan, duplicate background and call it footstep. You probably have sync and snap on, so when duplicating background you'll have to do it on the first frame on the timeline, but when we go inside footstep you'll want to do it on your middle frame. Also DO NOT ALTER THE TIMING OF THE MOTION TWEEN.

Go inside footstep, make a new layer to draw in, delete the background layer, unlock the mask and turn the mask to outline (this way you can see your boundaries but it doesn't cover what you're drawing). On your new layer make your new drawing. In my case, I'm making footprints. As you can see I made sure they were flush with the boundaries of the mask.


Now let's go back to the stage and play this.


As you can see we have a few problems. The footsteps appear only half the time, and more importantly, there's no multiplaning. What kind of multiplaning tutorial is this?

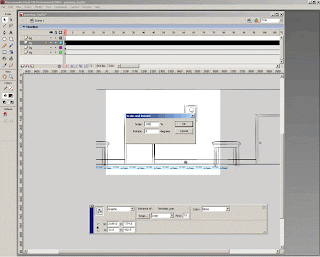
Let's fix the multiplane problem first. And it's such a simple fix. On the stage select footstep_pan, hit ctrl+alt+s to bring up the Scale/Rotate dialogue box, and scale it up somewhat. The amount you scale this symbol up determines the increased speed of this plane's movement. If you want a subtle multiplane, scale it up a bit. If you want a big increase in speed, scale it up a lot. The footsteps should be subtle so I'm only scaling it up a bit (the screenshot says 105%, but I eventually settled on 110). Also it's important when scaling the _pan symbols to either use the scale/rotate dialogue box, or make sure that it's scaling relative to the symbol's center point.

Now that we have the footsteps moving faster, let's fix the problem of it only appearing half the time. Select footstep_pan copy it and paste it in place on a new layer, then select the new instance and put its starting frame on 1.

Now let's check it out.


It's working, but there are a few problems. First of all, it's super subtle, but that's okay we'll do more impressive stuff in a bit. And second, sometimes you want objects to multiplane that don't run the course of the entire screen. Maybe you want to add something like a piece of cheese.

Cheese? What a great idea, let's do that. Copy the footprint_pan instance that starts on frame 51, paste it in place on a new layer. Duplicate footprint_pan and call it cheese_pan. Enter cheese_pan, duplicate footprint and call it cheese. Enter cheese, delete out the footprint drawing and draw a piece of cheese.

Now go back out to the stage. Now your cheese is moving at the same speed as the footprints. To fix that just scale the cheese up some more using the scale/rotate dialogue box. You probably won't like the verticle placement that happens when you scale-up the symbol, so just adjust that placement to something you like. ONLY MOVE THE SYMBOL TO ADJUST VERTICLE PLACEMENT, DO NOT MOVE THE SYMBOL LEFT OR RIGHT (this will make sense in a bit).

Now here is what we have


Getting better, but let's say you want more than one piece of cheese, and you want to adjust the starting spot for the piece of cheese that is already there. To change the starting spot, just change which frame cheese_pan starts looping on. To add another piece of cheese, just copy cheese_pan, paste it in place on a new layer and adjust the starting frame. My two instances here start on frame 80 and 45.

And here's what that looks like


For the sake of this tutorial I'm going to do a bit more mutliplaning, but in order to do that, I think I need more ground to play with and less wall showing. That's an easy fix, just select everything and move it up a bit. Then select just the footprint_pan instances and move those down, and then select the cheese_pan instances and move those down even more.

Now that we have more ground to play with, lets add some more cheese, this time between the wall and the footprints. Easy enough, just copy an instance of cheese_pan and scale it to a size that is somewhere between the scale of the wall (100 %) and the footprints (110%), and then vertically place the new cheese between the wall and the footprints. To tell what percentage your symbols are scaled, bring up the transform dialogue box (ctrl+t). Once you have the placement for the cheese correct, you can add more cheese on that plane by copying it, pasting it in place and changing the starting frames. In the screenshot bellow I also added another piece of cheese closer in the forground using the same technique (except I scaled the cheese_pan instance larger instead of smaller).
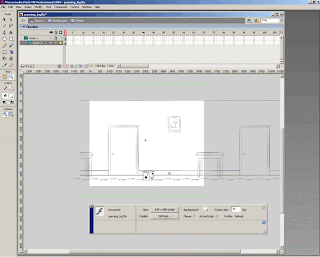
And here it is playing


A thoroughly ridiculous background, but you get the point. And of course you don't have to be limited to cheese, you can keep making more duplicates for other objects like chairs, or whatever your little heart desires. I decided this long, fermented dairy loving hallway needed some illumination, so I also added some lightbulbs comming in from off screen. It's a little stupid since realistically speaking these lightbulbs are way too low, and the forground lightbulbs are actually closer to the ground than the background bulbs, but what do you want from me, I was making this up as I went along. Normally I would have figured out my horizon line to determine the verticle placement and height for all the objects before doing any of this.

But enough excuses, here it is, my final multiplane.


And remember, I am now offering this tutorial's FLA for 3 dollars through PayPal. Currently it's only available for Flash CS3 and up, but if there's demand I can make it for other versions as well. The FLA includes the looping background pan and the multiplaning looping background pan.


E-mail address you'd like to receive .ZIP file (25 kb)


Tuesday, May 22, 2007

Looping Background Pans

Update: I am now offering this tutorial's FLA for 3 dollars through PayPal. Currently it's only available for Flash CS3 and up, but if there's demand I can make it for other versions as well. The FLA includes the looping background pan and the multiplaning looping background pan.


E-mail address you'd like to receive .ZIP file (25 kb)


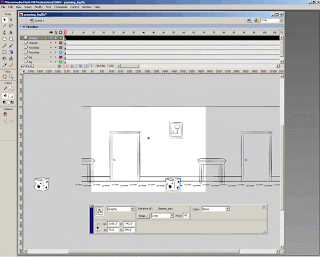
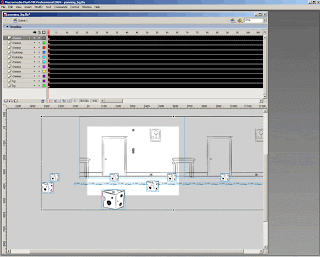
Last year I was working on a show that had a lot of panning backgrounds. I would spend a lot of time making sure backgrounds would pan and loop correctly, so I decided to come up with a method that would work every time. Using my technique it's very easy to make those Hanna Barbara-esq looping backgrounds. Also, this technique is a good start to making multiplaning pans like this


But let's start simple.

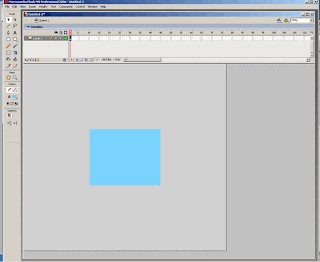
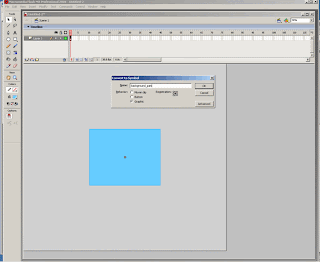
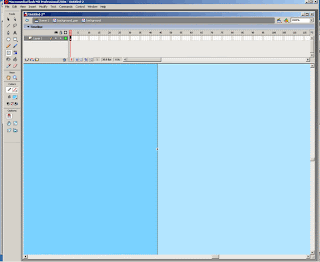
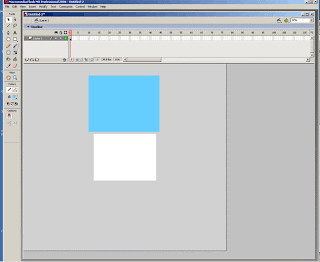
Step 1: Create a paint square (with no stroke) that is larger than the stage. The square you make is almost (but not quite yet) the size of the background drawing you'll end up making, so keep that in mind. You might want something pretty wide, but to make things easier here, I'm making one that is just barely wider than the stage.

Step 2: Align this piece of paint to the center of the stage both horizontally and vertically. You can do this through the Align panel which you can bring up through the hotkey ctrl+k.

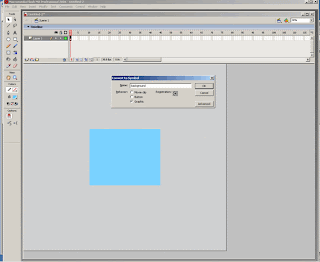
Step 3: Symbolize the paint. This symbol will be your background drawing, so call it something clever. I called mine background.

Step 4: Symbolize the background symbol. This new symbol will contain the motion tween that makes the background pan. I named this symbol background_pan.

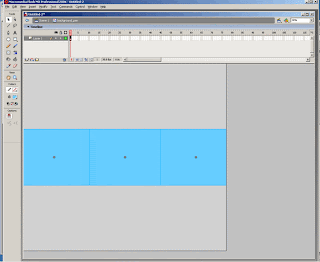
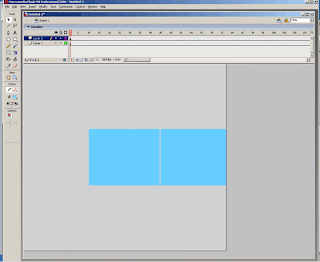
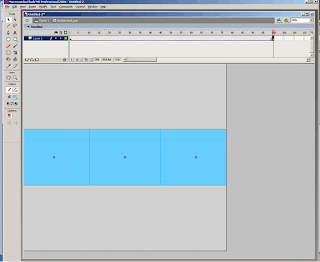
Step 5: Enter the symbol background_pan. Then copy and paste-in-place the symbol background twice. Place the first new instance butting up directly on the original instance's left side. Place the second instance butting up on the original instances right side. Only move these instances horizontally, and you might want to turn snapping on, to make sure these symbols are actually touching each other.
Step 6: Create a new keyframe farther down the timeline. YOU MUST PICK AN EVEN KEYFRAME NUMBER. The frame number you pick will determine the speed of your background tween. A low keyframe number like 60 will create a very fast background pan. A high keyframe number like 700 will create a very slow pan. For now just guess, you can mess around with it later. I'm choosing 100 because it makes the math easier (there is a little math later on, stop crying).

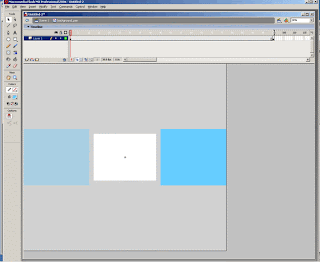
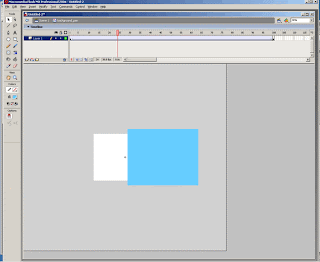
Step 7: Do you want the background to move left or right? Now is the time to decide. I want my background to move from right to left so on frame 1 I deleted each instance of background except for the right most one. On frame 100 I deleted every instance except the leftmost one. In the screen shot below I am on frame one and have onion skinned the whole timeline.


Step 8: Motion tween the two keyframes. No easing! Here you will get an idea of your pan's speed. Now is the time to make adjustments to the timing by changing the frame number of the second key frame, but remember YOU MUST PICK AN EVEN NUMBER. I'm stubborn so I'm sticking with 100.


Step 9: Big step! Exit background_pan. Now that you're on the stage, make the file's timeline longer than the pan length inside background_pan (you can't show off a background looping if you don't hold on it long enough). Then copy background_pan and paste it in place on a new layer. Then change the starting frame for the new instance following this simple formula: Length of pan divided by two, plus one. Or if you want to look fancy, L/2 + 1. My pan is 100 frames long, 100 divided by two is 50, and adding one to that gives me 51, so my starting frame is 51. Now you see why I told you it's important to pick an even number for your panning length.


Step 10: Make sure both symbols are set to loop and hit play. It almost works! But there's a problem, there is a gap between the two background instances. I honestly have no idea why this happens, but it does. The length of your pan will effect how much of a gap there is. If your pan is fast the gap will be bigger, if your pan is slower, the gap will be smaller. To fix this problem we're going to go into the background symbol and stretch it, but the amount we stretch it will be determined by the speed of your pan, so make sure you like your speed before going any farther.

Step 11: Go inside the background_pan instance whose start frame you adjusted. Go to that new starting frame inside the symbol (But if you're good and are using Enter Graphic at Current Frame you're already right there). Make a keyframe, so that you can now enter the symbol background at that position.
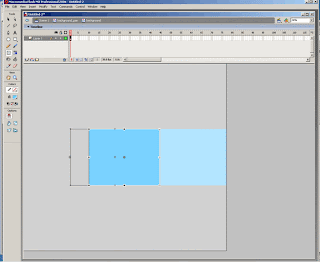
Step 12: Now we stretch the paint. But there's a problem. Normally if you select the paint, hit q to enable free transform, and try to stretch the paint, it only stretches in one direction
Step 13: But if you hold ALT while stretching the paint, it will now stretch from the center, which is what we want.


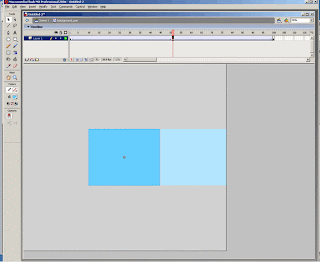
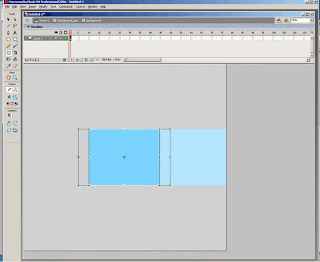
Step 14: Zoom in really close to one edge and stretch the paint while holding down ALT. You'll notice that the other instance of the background is adjusting as well, this is because you're holding alt so both sides are moving. Stretch the paint so that the instance your adjusting is just touching the tinted instance still outside on the stage.

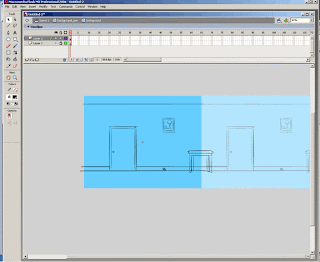
Step 15: Great! Now we have the exact size the background needs to be, so go and draw your background on a new layer that's above the paint square.

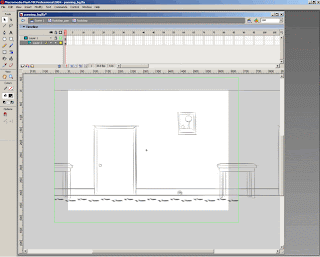
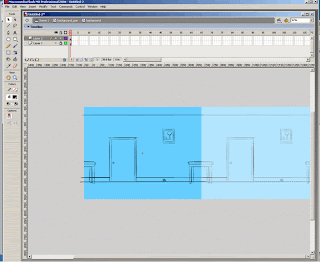
Step 16: There are a couple things you'll notice looking at my background drawing. First of all, it's not a good drawing. That's my fault, I wasn't trying too hard. Second, a bunch of the horizontal lines overshoot the background image size we've established. That'll be an easy fix we'll take care of in a bit. The bigger problem is with the table I've drawn. To place the table where I want it to be, it now WAY overshoots the background boundary. To fix this, just cut out the overshooting part of the table and paste it in-bounds on the other side of the background.

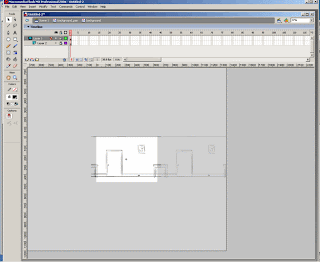
Step 17: To fix the other overshooting lines, take the paint square, bring that layer on top and convert it to a mask

Step 18: Go out to the stage and enjoy your looping background. Here's a swf of mine.


As I said, this technique can also be altered a bit to create mutliplaning pans like this one.


If people are interested I can go into the next steps you'd need to take in order to make the multiplane work.

And remember, I am now offering this tutorial's FLA for 3 dollars through PayPal. Currently it's only available for Flash CS3 and up, but if there's demand I can make it for other versions as well. The FLA includes the looping background pan and the multiplaning looping background pan.


E-mail address you'd like to receive .ZIP file (25 kb)