Last year I was working on a show that had a lot of panning backgrounds. I would spend a lot of time making sure backgrounds would pan and loop correctly, so I decided to come up with a method that would work every time. Using my technique it's very easy to make those Hanna Barbara-esq looping backgrounds. Also, this technique is a good start to making multiplaning pans like this
But let's start simple.
Step 1: Create a paint square (with no stroke) that is larger than the stage. The square you make is almost (but not quite yet) the size of the background drawing you'll end up making, so keep that in mind. You might want something pretty wide, but to make things easier here, I'm making one that is just barely wider than the stage.
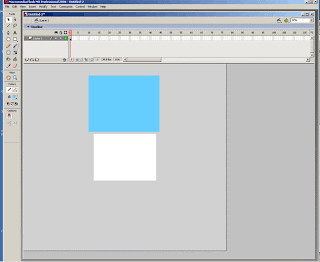 Step 2: Align this piece of paint to the center of the stage both horizontally and vertically. You can do this through the Align panel which you can bring up through the hotkey ctrl+k.
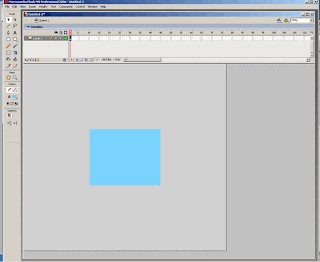 Step 3: Symbolize the paint. This symbol will be your background drawing, so call it something clever. I called mine background.
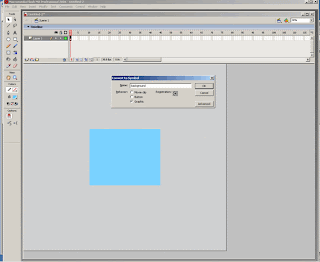 Step 4: Symbolize the background symbol. This new symbol will contain the motion tween that makes the background pan. I named this symbol background_pan.
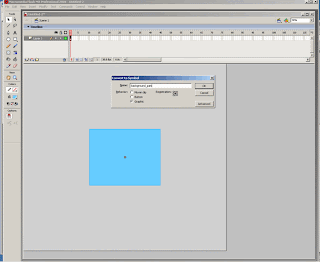 Step 5: Enter the symbol background_pan. Then copy and paste-in-place the symbol background twice. Place the first new instance butting up directly on the original instance's left side. Place the second instance butting up on the original instances right side. Only move these instances horizontally, and you might want to turn snapping on, to make sure these symbols are actually touching each other.
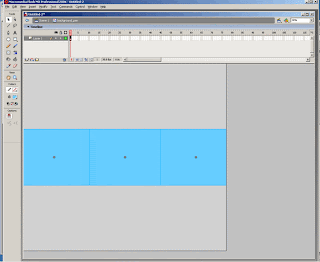 Step 6: Create a new keyframe farther down the timeline. YOU MUST PICK AN EVEN KEYFRAME NUMBER. The frame number you pick will determine the speed of your background tween. A low keyframe number like 60 will create a very fast background pan. A high keyframe number like 700 will create a very slow pan. For now just guess, you can mess around with it later. I'm choosing 100 because it makes the math easier (there is a little math later on, stop crying).
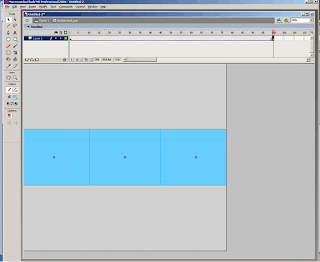 Step 7: Do you want the background to move left or right? Now is the time to decide. I want my background to move from right to left so on frame 1 I deleted each instance of background except for the right most one. On frame 100 I deleted every instance except the leftmost one. In the screen shot below I am on frame one and have onion skinned the whole timeline.
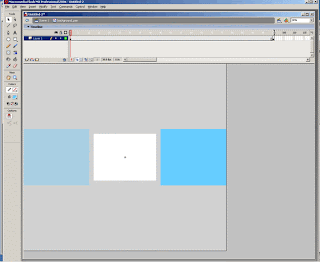
Step 8: Motion tween the two keyframes. No easing! Here you will get an idea of your pan's speed. Now is the time to make adjustments to the timing by changing the frame number of the second key frame, but remember YOU MUST PICK AN EVEN NUMBER. I'm stubborn so I'm sticking with 100.
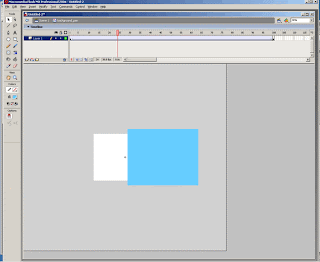
Step 9: Big step! Exit background_pan. Now that you're on the stage, make the file's timeline longer than the pan length inside background_pan (you can't show off a background looping if you don't hold on it long enough). Then copy background_pan and paste it in place on a new layer. Then change the starting frame for the new instance following this simple formula: Length of pan divided by two, plus one. Or if you want to look fancy, L/2 + 1. My pan is 100 frames long, 100 divided by two is 50, and adding one to that gives me 51, so my starting frame is 51. Now you see why I told you it's important to pick an even number for your panning length.
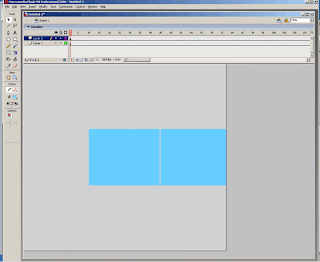
Step 10: Make sure both symbols are set to loop and hit play. It almost works! But there's a problem, there is a gap between the two background instances. I honestly have no idea why this happens, but it does. The length of your pan will effect how much of a gap there is. If your pan is fast the gap will be bigger, if your pan is slower, the gap will be smaller. To fix this problem we're going to go into the background symbol and stretch it, but the amount we stretch it will be determined by the speed of your pan, so make sure you like your speed before going any farther.
Step 11: Go inside the background_pan instance whose start frame you adjusted. Go to that new starting frame inside the symbol (But if you're good and are using Enter Graphic at Current Frame you're already right there). Make a keyframe, so that you can now enter the symbol background at that position.
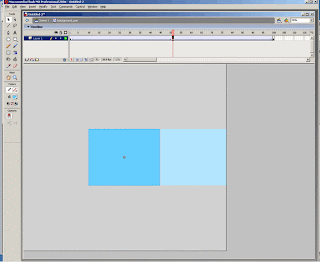 Step 12: Now we stretch the paint. But there's a problem. Normally if you select the paint, hit q to enable free transform, and try to stretch the paint, it only stretches in one direction
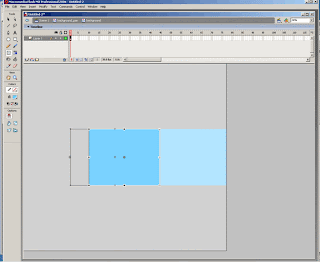 Step 13: But if you hold ALT while stretching the paint, it will now stretch from the center, which is what we want.
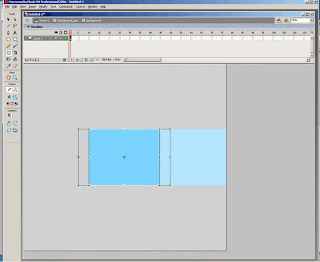
Step 14: Zoom in really close to one edge and stretch the paint while holding down ALT. You'll notice that the other instance of the background is adjusting as well, this is because you're holding alt so both sides are moving. Stretch the paint so that the instance your adjusting is just touching the tinted instance still outside on the stage.
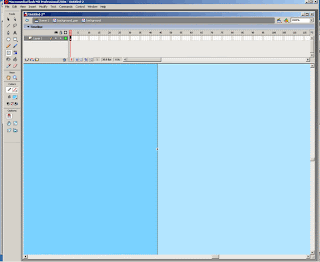 Step 15: Great! Now we have the exact size the background needs to be, so go and draw your background on a new layer that's above the paint square.
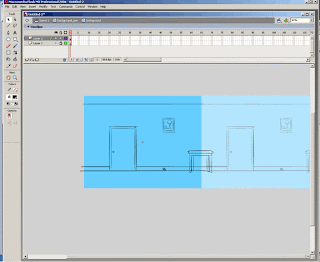 Step 16: There are a couple things you'll notice looking at my background drawing. First of all, it's not a good drawing. That's my fault, I wasn't trying too hard. Second, a bunch of the horizontal lines overshoot the background image size we've established. That'll be an easy fix we'll take care of in a bit. The bigger problem is with the table I've drawn. To place the table where I want it to be, it now WAY overshoots the background boundary. To fix this, just cut out the overshooting part of the table and paste it in-bounds on the other side of the background.
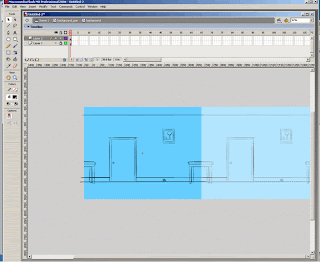 Step 17: To fix the other overshooting lines, take the paint square, bring that layer on top and convert it to a mask
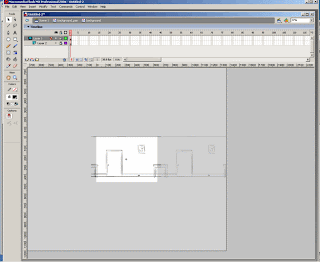 Step 18: Go out to the stage and enjoy your looping background. Here's a swf of mine.
As I said, this technique can also be altered a bit to create mutliplaning pans like this one.
If people are interested I can go into the next steps you'd need to take in order to make the multiplane work.
And remember, I am now offering this tutorial's FLA for 3 dollars through PayPal. Currently it's only available for Flash CS3 and up, but if there's demand I can make it for other versions as well. The FLA includes the looping background pan and the multiplaning looping background pan.
7 comments:
FYI: Tutorial posted onto Coldhardflash "Tips and Tricks" Sticky. Cheerio
ref: http://bbs.coldhardflash.com/viewtopic.php?t=459
dude that is pretty awesome I will have to read all the way through it when i have a little more time...
P
That's great! Thank you.
Thanks I just did this tutorial and it worked for me.
What does in mean in Step 7 when it states: "I felted each instance of background except for the right most one."?
"I felted each instance of background except for the right most one."
I think it means remove or delete the left and center rectangles but leave it there the right one.
Felted is a mistake, it should read "deleted."
I just fixed the typo.
Post a Comment