Update: I am now offering this tutorial's FLA for 3 dollars through PayPal. Currently it's only available for Flash CS3 and up, but if there's demand I can make it for other versions as well. The FLA includes both the standard dolly shot example and the dolly shot with added vertical and horizontal movement.
One quick note. For this tutorial, we're going back one step from the last example. In the last tutorial I nested all the motion tweens into one symbol. For this tutorial, I broke them out of that overall symbol, so the stage looks like this
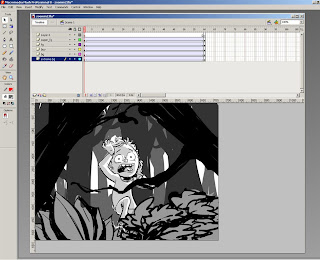
And it plays like this
Let's say you're not happy with a simple push in. What if you want the camera to also track left and right, up and down? It's actually not that hard, and in fact, the best thing you could have done was to first create the dolly in. When you make a keyframe in Flash, that key holds information about the symbols horizontal and vertical placement, as well as its scale and rotation. If you want to make a complex move that effects many of these aspects, but you want these aspects to move independently of each other, you need to make different motion tweens to effect each aspect. And you do that by nesting motion tweens.
So what we have on the stage here are motion tweens that effect each of these symbol's scale. I next want to effect the horizontal position of each symbol, but in order to not mess with the scaling of each symbol, I use the Pringle to nest each tween into a new symbol, leaving me with a stage that looks like this.
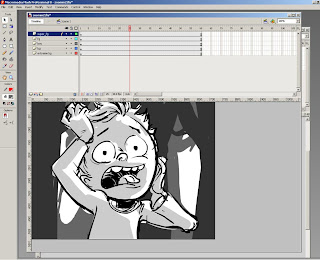 Now when I key horizontal movements on these new symbols, it doesn't affect the nested motion tweens that control scaling.
So I want the camera to start off more to the left, then move to the right, and then back to the left, with the framing ending on the boy's face favoring his right eye. To do this, first I make keyframes on all layers at frame 1, frame 40 and frame 60. Next I adjust their horizontal placement, keeping in mind that the closer to the foreground an element is, the more it should move.
To keep all of my units of movement the same, I turn off the work area, and view the stage at one hundred percent. At frame 1 I make the following layer adjustments
- super_fg: Move Right 160 (shift+right arrow 16 times)
- fg: Right 120
- boy: Right 80
- bg: Right 40
- extreme_bg: Right 20
- super_fg: Left 80
- fg: Left 60
- boy: Left 40
- bg: Left 20
- extreme_bg: Left 10
- super_fg: Right 320
- fg: Right 270
- boy: Right 180
- bg: Right 90
- extreme_bg: Right 40
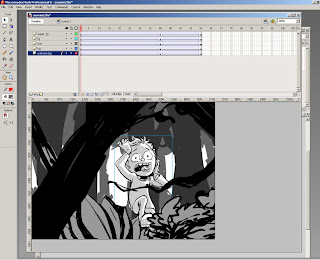 And here's what that looks like
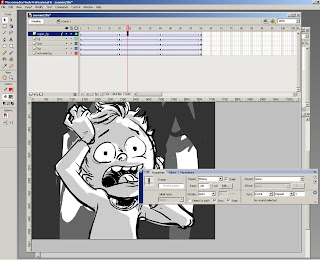 Here's what that looks like.
Now we have horizontal movement. To add vertical movement, we do the same thing all over again. First, use the Pringle to nest each motion tween in its own symbol.
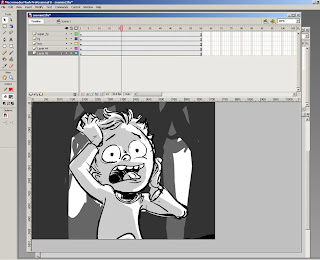
Then figure out what you want your vertical motion to be like. I decided that while the camera is moving to the right (frame 1-40), I want it to bounce up and then down, and while the camera moves to the left (frames 40-60), I want it to move up. That means the camera is down at frame 1, up at frame 20, down at frame 40 and up at frame 60. So the first thing to do is key out all the layers at those frames, and then adjust their positions accordingly. I'll spare you the boring details of how much I moved each layer up or down, but here's what the timeline looks like.
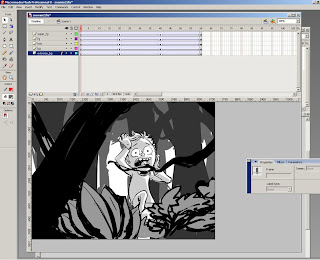
And here's how it plays.
Almost there, next I smooth it out by adding some more keyframes and easing.
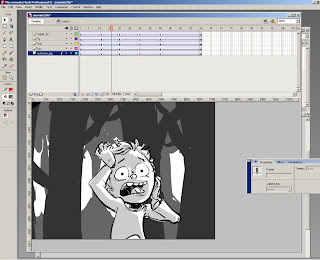
Let's see how it looks.
Now that I see it done, I decide I could tweak the horizontal movement a bit. I think the camera should start more to the left. I also think the movement to the right is a bit extreme, and since I like the final position of the head, that means moving the horizontal position at frame 40, over to the left as well. These changes are easy to do, I just go one level into each symbol (this is the level that controls horizontal placement) and adjust the left/right movement accordingly.
And, one last adjustment. With all this movement, I now think the two forground elements move off screen too quickly. Again, this is an easy fix, I simply go deep into each of those nested symbols until I get to the one controlling the scaling tween and then size down the last keyframe a bit so that they don't grow so large. And here it is, the final shot.
And once more, I am now offering this tutorial's FLA for 3 dollars through PayPal. Currently it's only available for Flash CS3 and up, but if there's demand I can make it for other versions as well. The FLA includes both the standard dolly shot example and the dolly shot with added vertical and horizontal movement.
3 comments:
Hey Adam,
Thanks for this info, very interesting stuff. I was wondering if its possible to create that strange camera effect where the camera zooms in on the subject and the background moves away at the same time. In live action, its accomplished by zooming in on the subject with a zoom lens as you move the camera away from the subjectat the same time. Its a real weird looking effect but I'm not sure you can do the same thing in Flash, however I could be wrong.
Hi Jim,
You're talking about a Dolly Zoom shot. Off the top of my head, I'd have to say Goodfellas uses this shot better than any movie I've ever seen. A good YouTube montage of these shots can be found here. Unfortunately they speed up the Goodfellas shot, when what is so great about it is that it's subtly going on through their entire conversation, turning what is usually a pretty cheesy effect into something more meaningful.
But anyway, faking this in Flash would be easy. Put all the layers' center points at the same spot, and tween the layers the opposite of how you'd normally do a dolly in shot, so the background tweens the most and the foreground (where your subject is) doesn't move at all.
it's really nice. really helpful. THanks.
Post a Comment